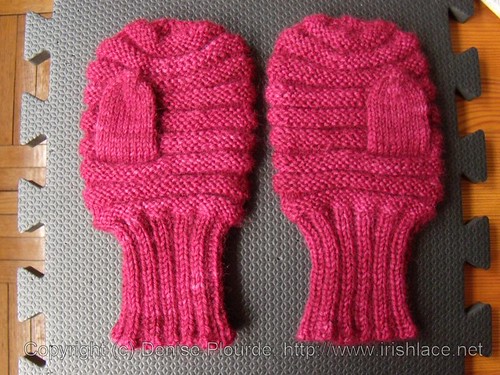
The ridges of knit and purl make these mittens very forgiving. If you're close to the right size, you're set.
When I first learned to knit as a child, this was one of the things my grandmother and mother taught me. This is a "recipe" pattern. Swatching and measuring (preferably against the hand that will wear it) is needed. It's a forgiving fit, but ribbing can stretch only so far.
Supplies:
Yarn: Sample used a bit less than 100g Araucania Nature Wool (worsted weight wool) for medium women's mittens. Also small amount of cotton for afterthought thumb.
Needles: DPNs or circs (magic loop or two circs) to give you a fabric you like with the yarn you're using. Sample used 3.75mm DPNs for a gauge of 6sts/in
Pattern:
Swatch in the round with the yarn you want to use. Get your stitch gauge. (Mine worked out to 6 st/in.) Measure your hand around the widest part. (For me, it's the knuckles; your hands may vary. My measurement was just about 8 in.) Multiply gauge by width. (6 st/in * 8 in = 48 stitches.) If the resulting number is not divisible by four, round up to the nearest multiple of four.
Cuff: Using DPNs (or magic loop or two circs), cast on the necessary number of stitches. Join, being careful not to twist the cast-on row. Work k2p2 ribbing for a while. (It depends on how long you want the cuff to be.)
Hand: When you are tired of working the ribbing, start working the main part of the mitten. This is done by alternating 4 purled rounds with 4 knit rounds.
When your knitting just about reaches the thumb knuckle, make room for the thumb. (This is a fairly forgiving pattern (have I mentioned that?), by the way, so if it's a little high or a little low, don't fret about it too much.) When my mother and grandmother made these, they would put 6-8 stitches on a holder, and then they would cast on 6-8 stitches on the needle. For this pair of mittens, I knitted 8 stitches with waste yarn, and then knitted over the waste yarn with the mitten yarn (like an afterthought heel for socks).
Continue working k4rounds,p4rounds until the work reaches the fingertips. Decrease 1/4 of the stitches for each decrease round, and work even between decrease rounds. Something like this:
First decrease round: (k2tog, k2) around
Next round: knit even
Second decrease round: (k2tog, k) around
Next round: knit even
Third decrease round: k2tog around
Next round: knit even
Fourth decrease round: k2tog around
When you get down to about 6 stitches, break the yarn, run it through the live stitches a few times (purse-string style), and weave in the ends.
For these mittens, I started the decreases in the previous k4round section. The knitting had cleared the little finger at that point, so it could afford to lose the width.
Thumbs: Remove the waste yarn (if you used it) and pick up the stitches. (Pick up and knit the stitches if you did a separate cast-on for the above-the-thumb area.) Pick up an additional stitch on each side of the thumb (to avoid holes). Knit the thumb in plain stockinette, taking care to twist the side stitches on the first round (again, the holes). When the thumb is long enough, start decreasing. k2tog,k2 (and so on) with a purse-string bind-off will work nicely. (For these mittens, I did paired k2tog and skp at three points. And then I used kitchener stitch to graft the remaining few stitches closed. Whatever works for you!)
Make another one, exactly the same. Or totally different if you want.
Yay! Mittens!
Seriously, these are pretty simple mittens. Pretty forgiving, and pretty quick. The k2p2 ribbing means that the cuff is pretty stretchy widthwise, and the k4rounds,p4rounds hand means that the hand is pretty stretchy lengthwise. So you do ribbing until you're bored, then you switch over to rounds, and when it looks thumb height, you make room for that, and when the whole thing looks long enough, you decrease and close up the top. Then you do the thumb in stockinette, and when that looks long enough, you decrease and close up the top.
They make especially good children's mittens since the stretchiness means they accommodate growth nicely. And the fact that there is no left and right means that if one is lost, another can be make with minimal fuss.