Toilet Paper Roll Cover and Swatchy Doily
|
Crochet version |
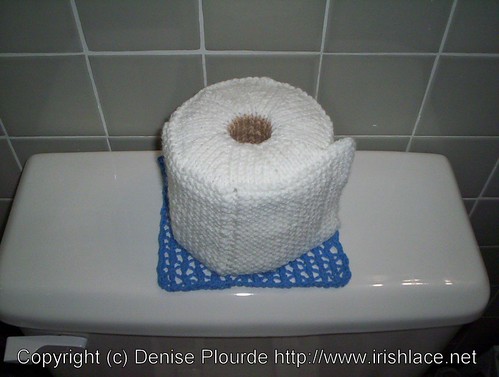
So what do you do if you want to have a spare roll of toilet paper easily available, and want to protect it from dust, but that's all?
Toilet Paper Roll CoverDimensions: To fit your roll of toilet paper. The sample measures 5" in diameter by 5" high (13cm by 13cm)
Supplies:Needles: Size 7/4.5mm, either straights and DPNs, or two circulars, or one circular long enough for magic looping.Yarn needle: To weave in ends Stitch markers: scraps of yarn in a contrasting color work nicely Toilet paper roll: Yep. This is couture toilet roll fashion. Custom made to fit that particular roll.
Yarn: You'll want two colors: one for the toilet paper, and one for the roll. White and something in the gray/beige/brown category are pretty safe bets. You'll also want needles that give you a fabric you like with those yarns. The sample used about 2 oz of white yarn and .25 oz of beige yarn. If your toilet paper comes in large rolls, you may need more yarn.
Pattern:This is worked from the bottom up. You'll knit the paper flat, then join to knit in the round. It's all knitting, no purling. Measure the circumference of the roll. Write it down: _______ Add one inch (or 2cm) to the previous number (if you want a longer flap, add extra length). Write it down: _______ Measure the diameter of the core. Multiply that by 3. (Yes, technically it should be 3.14. But 3 is close enough.) Write it down: _______ Measure the width of the roll. Write it down: _______ Cast on about 20 stitches and get your gauge in garter stitch. Write it down: _______ Taking your measurements and your gauge, calculate the number of stitches for: The circumference of the roll (round up if need be): _______
The circumference and flap (round up if need be): _______ (CAST ON)
Divide the circumference and flap stitches by 4 (round down if need be): _______ (PAPER SIZE)
Subtract the circumference number from the circumference and flap: _______ (FLAP BIND OFF)
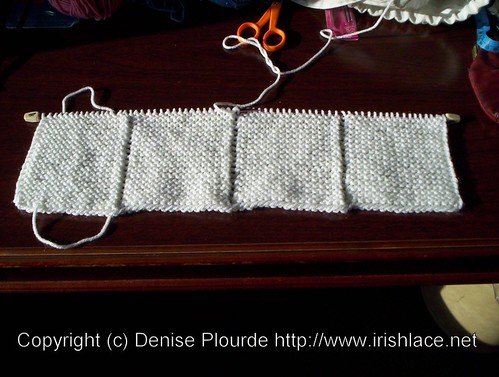
The circumference of the core (round down if need be): _______ (CORE STITCHES) Okay, enough measuring and calculating and writing. Time to start knitting. Sides/flat paper:
Cast on the number of stitches you calculated that you would need (this is the number labelled CAST ON), and place 3 stitch markers spaced evenly - refer to the PAPER SIZE number. (For the sample, I cast on 68 stitches, but I had a gauge of 4st/inch. And I placed stitch markers every 17 stitches.) If there is one extra stitch, I would add it to the square that will become the flap. If there are two extra stitches, I would add one to each end square. And for three extra stitches, I would short the last square (the one that will be tucked under the flap) by one stitch.
Row 1: Knit to first stitch marker, slip stitch marker, *yo, k2tog, knit to next stitch marker, repeat from * one more time, yo, k2tog, knit to end.
If you want to use a different stitch pattern, go for it. You'll need to swatch in pattern to figure out how many stitches to cast on, and work a rectangle the right size. Also, if you want to work the rectangle the other way (so it's tall and skinny rather than short and wide), you can do that too. You'll bind off the end and pick up stitches along one edge to do the top of the cover/side of the paper. Top/paper edges: Do yourself a favor and run a lifeline through the stitches on your needles. (A lifeline is a smooth piece of yarn that holds the stitches. Thread some scrap cotton or something similar (I tend to use dental floss - whatever works) into a yarn needle, and then insert the yarn needle purlwise into each stitch. (Don't include the stitch markers.) When all is done, you'll have a strand of thread running through all the stitches. This is a very good thing, because it may take you a time or two to get the decreases right, and having that lifeline will save some frustration if you have to rip back.
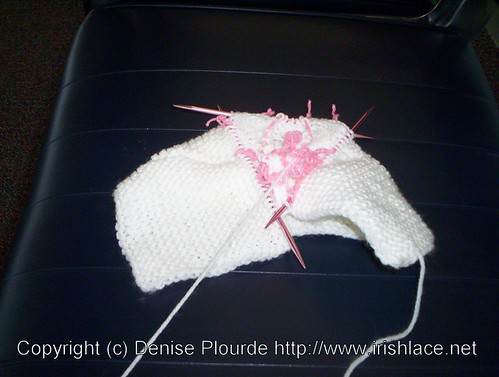
You're now going to decrease for the top of the cover, which is the area that represents the paper edges. If you've ever made a hat, this will be very similar. The main difference is that with a hat, you want to make a curved top. With this, you want it to lie flat. Exactly how you will do this will depend on your gauge, but I found that working 9 decreases every other round gave me a smooth flat surface. So I would start there. Working onto the double pointed needles, bind off the number of stitches you calculated for the FLAP BIND OFF. Take a look at the number stitches remaining. Is it evenly divisible by 9? If it is, great. Divide it by 9, and as you knit across, put stitch markers every X stitches. (You would knit 3X stitches onto each DPN.) If it isn't divisible by 9, distribute the extras (or the shortfall) evenly around as you knit around. So if you have 101 stitches, you would have two sections that have 12 stitches each, and all others would have 11. Or if you have 97 stitches, you would have two that have 10 stitches, and the rest have 11. (Or you could increase a few stitches or decrease a few stitches. It's up to you. I had 64 stitches, which I decreased to 63. Problem solved.) When you reach the end of that row, all the stitches will be on DPNs. Bring the last DPN around to the first, so you can start knitting in the round. Round 1: *k2tog, knit to next stitch, slip stitch marker, repeat from * around. Lifeline time again. It's hard to assess how things are going while they're on the needles. So slide the stitches off the DPNS (including stitch markers this time) and onto waste yarn. Pull the yarn fairly tight (so the stitches are lying about where they would be if you knit the next row, and take a look at it. Is the circle flat? Is the center opening about the size of the cardboard roll? If the circle is sloping up like a santa hat, try working more decreases per round. If it's ruffling and puffy, try working fewer decreases per round. Top/core: Once you're happy with the decreases, switch to the gray/beige/brown that you're using for the core. Knit several rounds even, without any decreases. (I knit 10 rounds.) You're looking for something that is long enough so you won't see the bottom of it at first glance. Once it's long enough, start decreasing. A couple of decrease rounds to get you to 6-8 stitches, and you're set. Break the yarn, thread it through the stitches (removing the stitch markers), draw them close (like a purse-string, which is what this closure is often called), weave in the the ends, and remove any remaining lifelines. With the bound off flap area on the outside, sew the flat-knitted section together to form a cylinder. (I used a running stitch.) Admire. Make Swatchy Doily. Swatchy Doily
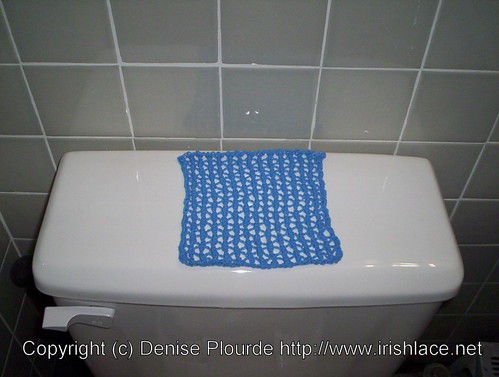
Dimensions: To suit your needs. The sample measures 6.5"/17cm square
Supplies:Needles: US 6/4mmYarn needle: for weaving in ends
Yarn: The sample used about .25oz/7g yarn.
Pattern:Find a stitch dictionary and a pattern you like. Cast on a likely number of stitches and swatch the pattern. *blinkblink* What do you mean, "is that all?" Okay, okay. If you insist. This particular doily is based on the Star Rib Mesh on page 196 of Barbara G. Walker's Treasury of Knitting Patterns. A centered double decrease is done as follows: Cast on 31 stitches If the Star Rib Mesh doesn't thrill you and you don't want to do a true Swatchy Doily of your own, you can always do a diagonal garter square. Diagonal Garter Square
Dimensions: To suit your needs. The sample measures 6.5"/17cm square
Supplies:Needles: US 7/4.5mmYarn needle: for weaving in ends
Yarn: The sample used about .75oz/20g yarn.
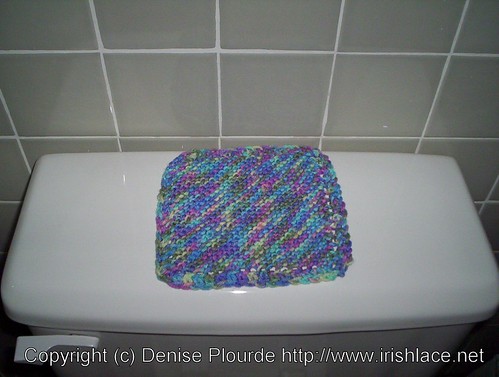
Pattern:If you think you know how to do this one, you do. If this is the first time you've seen it, read on.
Cast on 4 stitches So there you have it. A Toilet Paper Cover that doesn't try to hide what it's hiding. And a Swatchy Doily or a Diagonal Garter Square to place it on. If you are on Ravelry, you can see the page for this pattern at |